My track is located in an small old garage with the measure of only 4,1 x 2,9 m and because the track isn’t a permanent one, it’s built in modules. The space between the lanes are about 100 mm and with a total lane lengths of 19,5 m. The radius of the outer lane in the long curve in upper right corner (figure 1), is 1,75 m which makes it’s possible to go flat out – pretty spectacularly! You can actually go 100% throttle from passive flipper B.09 to the active flipper A.07, which is a distance a bit over 5 m, so despite the small footprint, I do have a kind of straight line 🙂
As you can see, I have made a kind of racing line around the track (GREEN LC‘s). If you are the only driver on track or no other cars are near you, your car will automatically follow that line, just like in real racing. The fact that the racing line isn’t the fastest lane is only a benefit, as it makes overtaking possible.
I got 8 LC‘s controlled by my anti collision system (A.01-A.08 – GREEN LC‘s) and 6 build-in Scalextric LC‘s (C.01-C.06), one for pit entry, another inside the pit lane and the rest around the track (MAGENTA and BLUE LC‘s). I have included the 4 blue LC‘s, so it is possible for a pursuing car to attack from the inside before each curve. That lay-out is a mix of traditional Scalextric Digital and automated anti collision operated ones and combine the best of both systems.
All 8 active flippers, the 14 passive ones (B.01-B.14) and the 6 Scalextric LC‘s have at all time the right potential.
LED in pit entry will reduce the speed limit in the pit area and will be released again at the pit exit. Scalextric C7042 digital power base is build-in at the start/finish line.
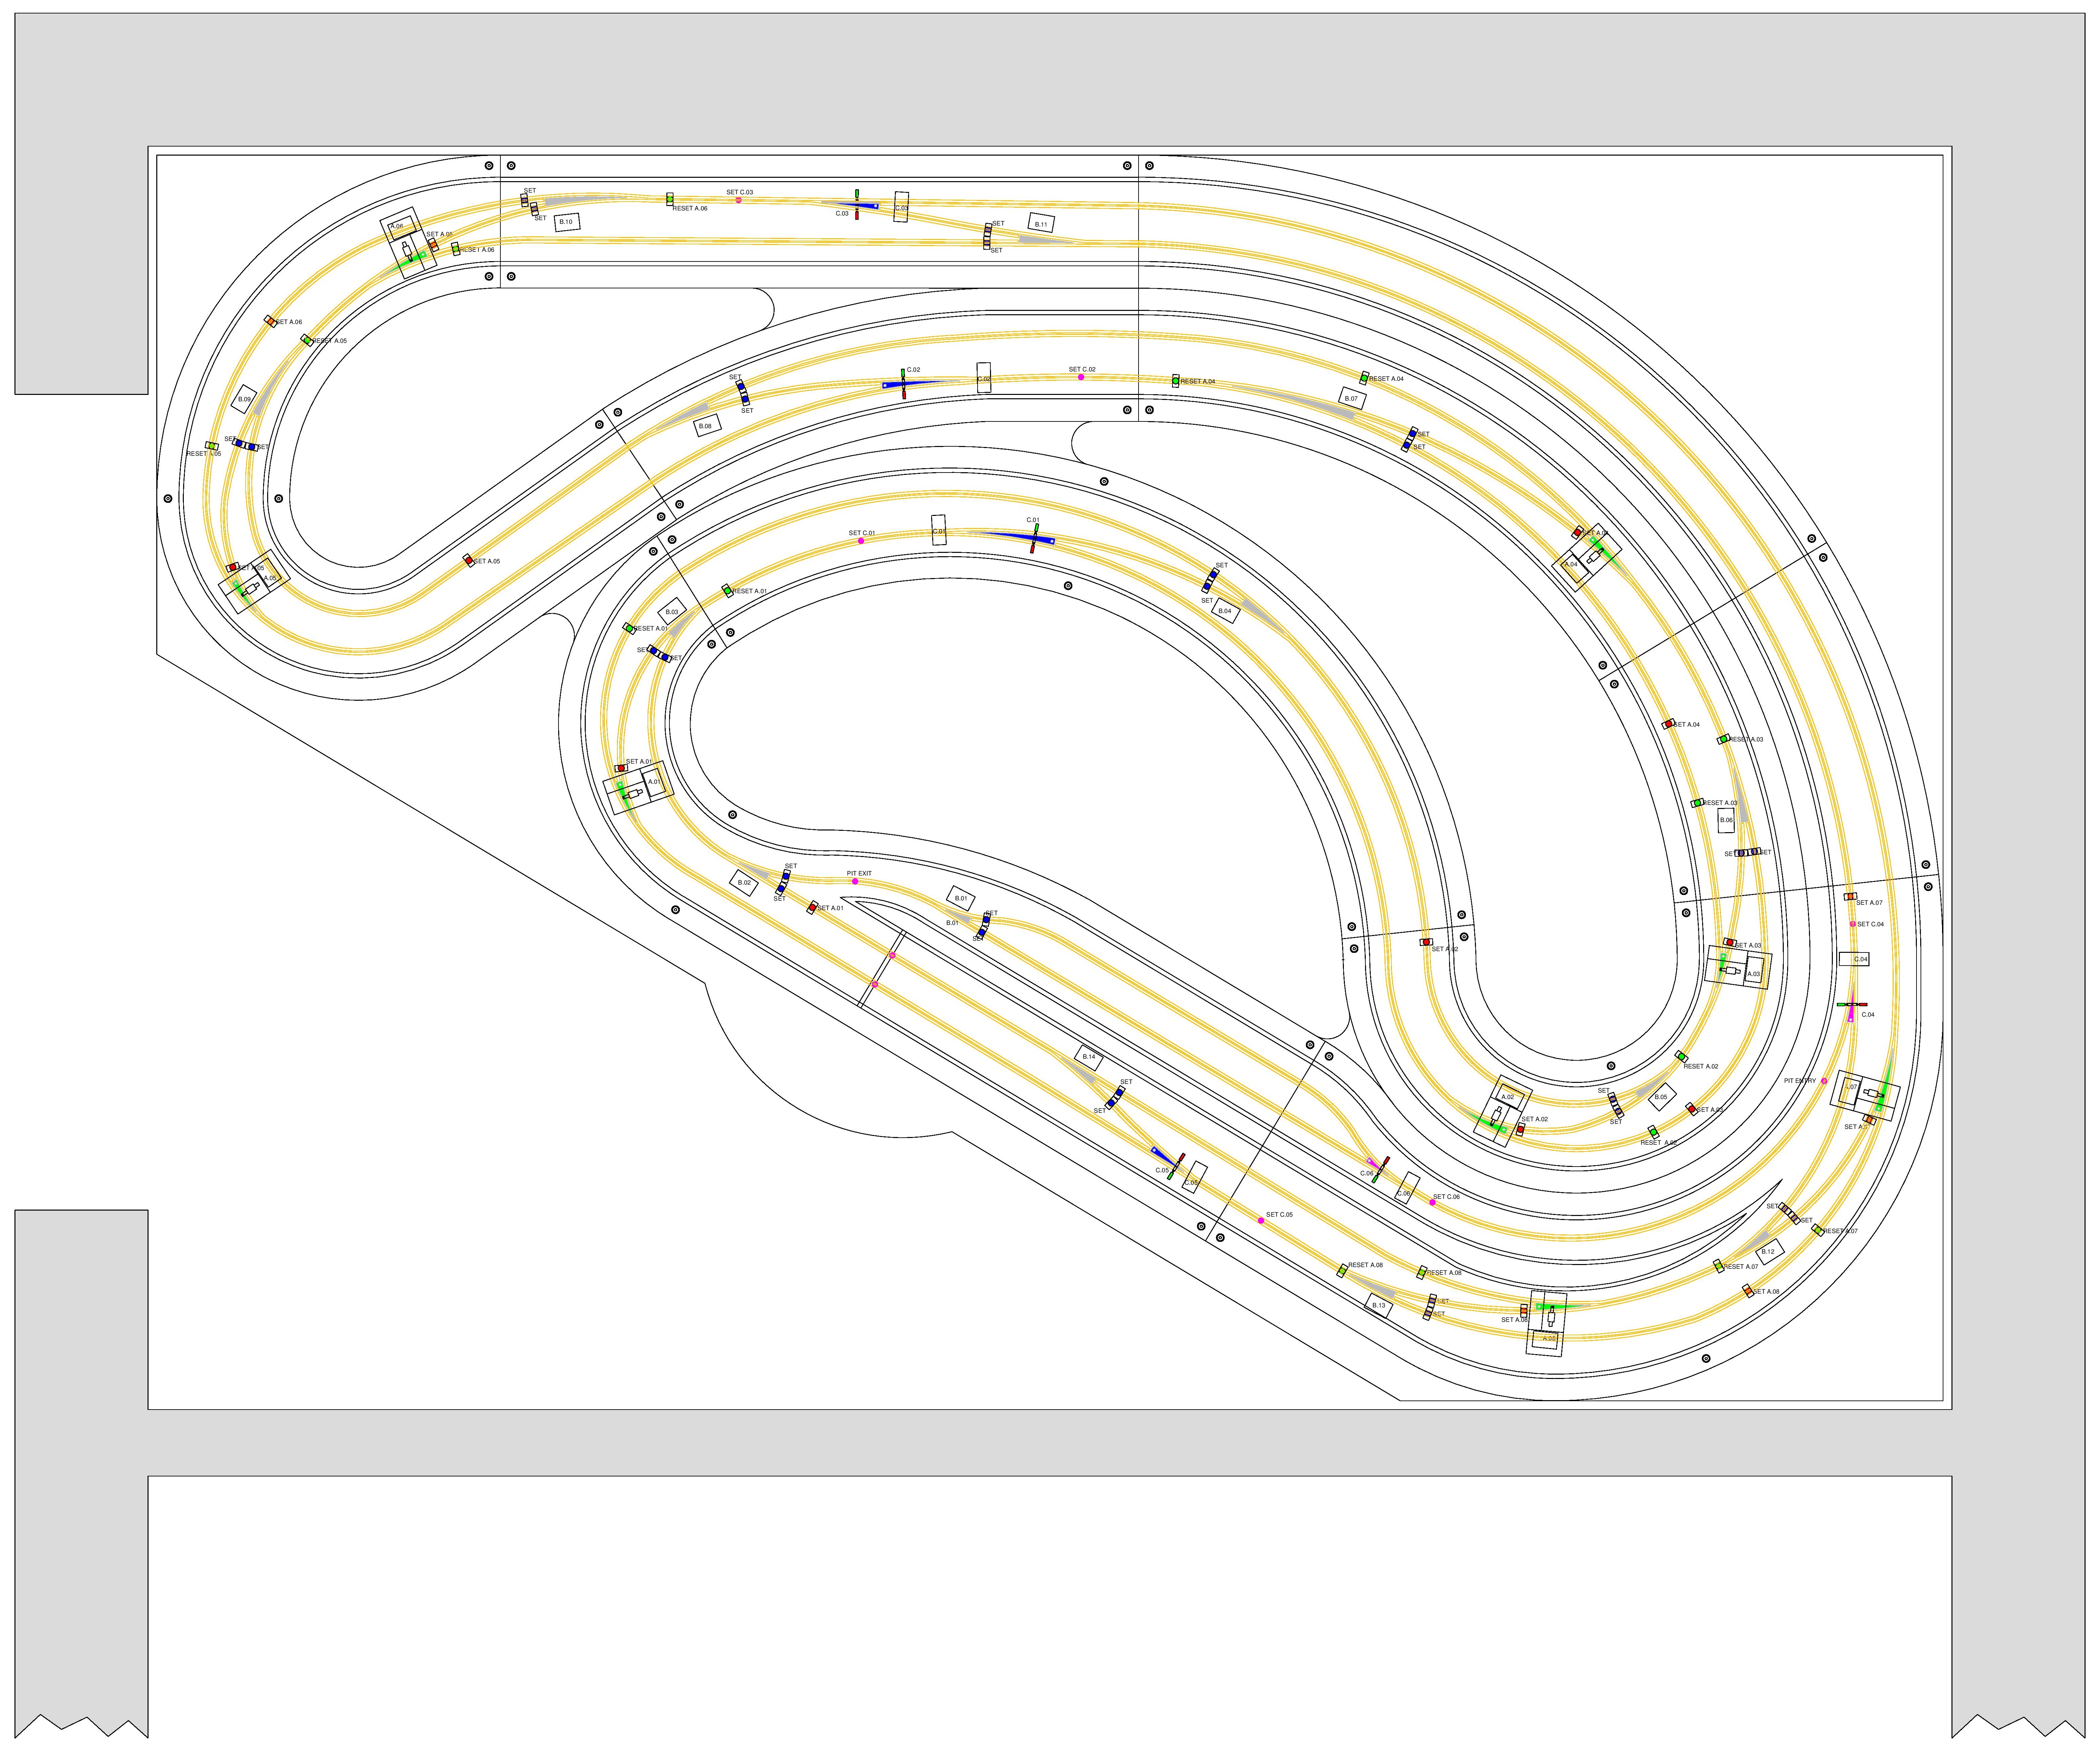
Figure 1: Here is my track with all it’s detection points.
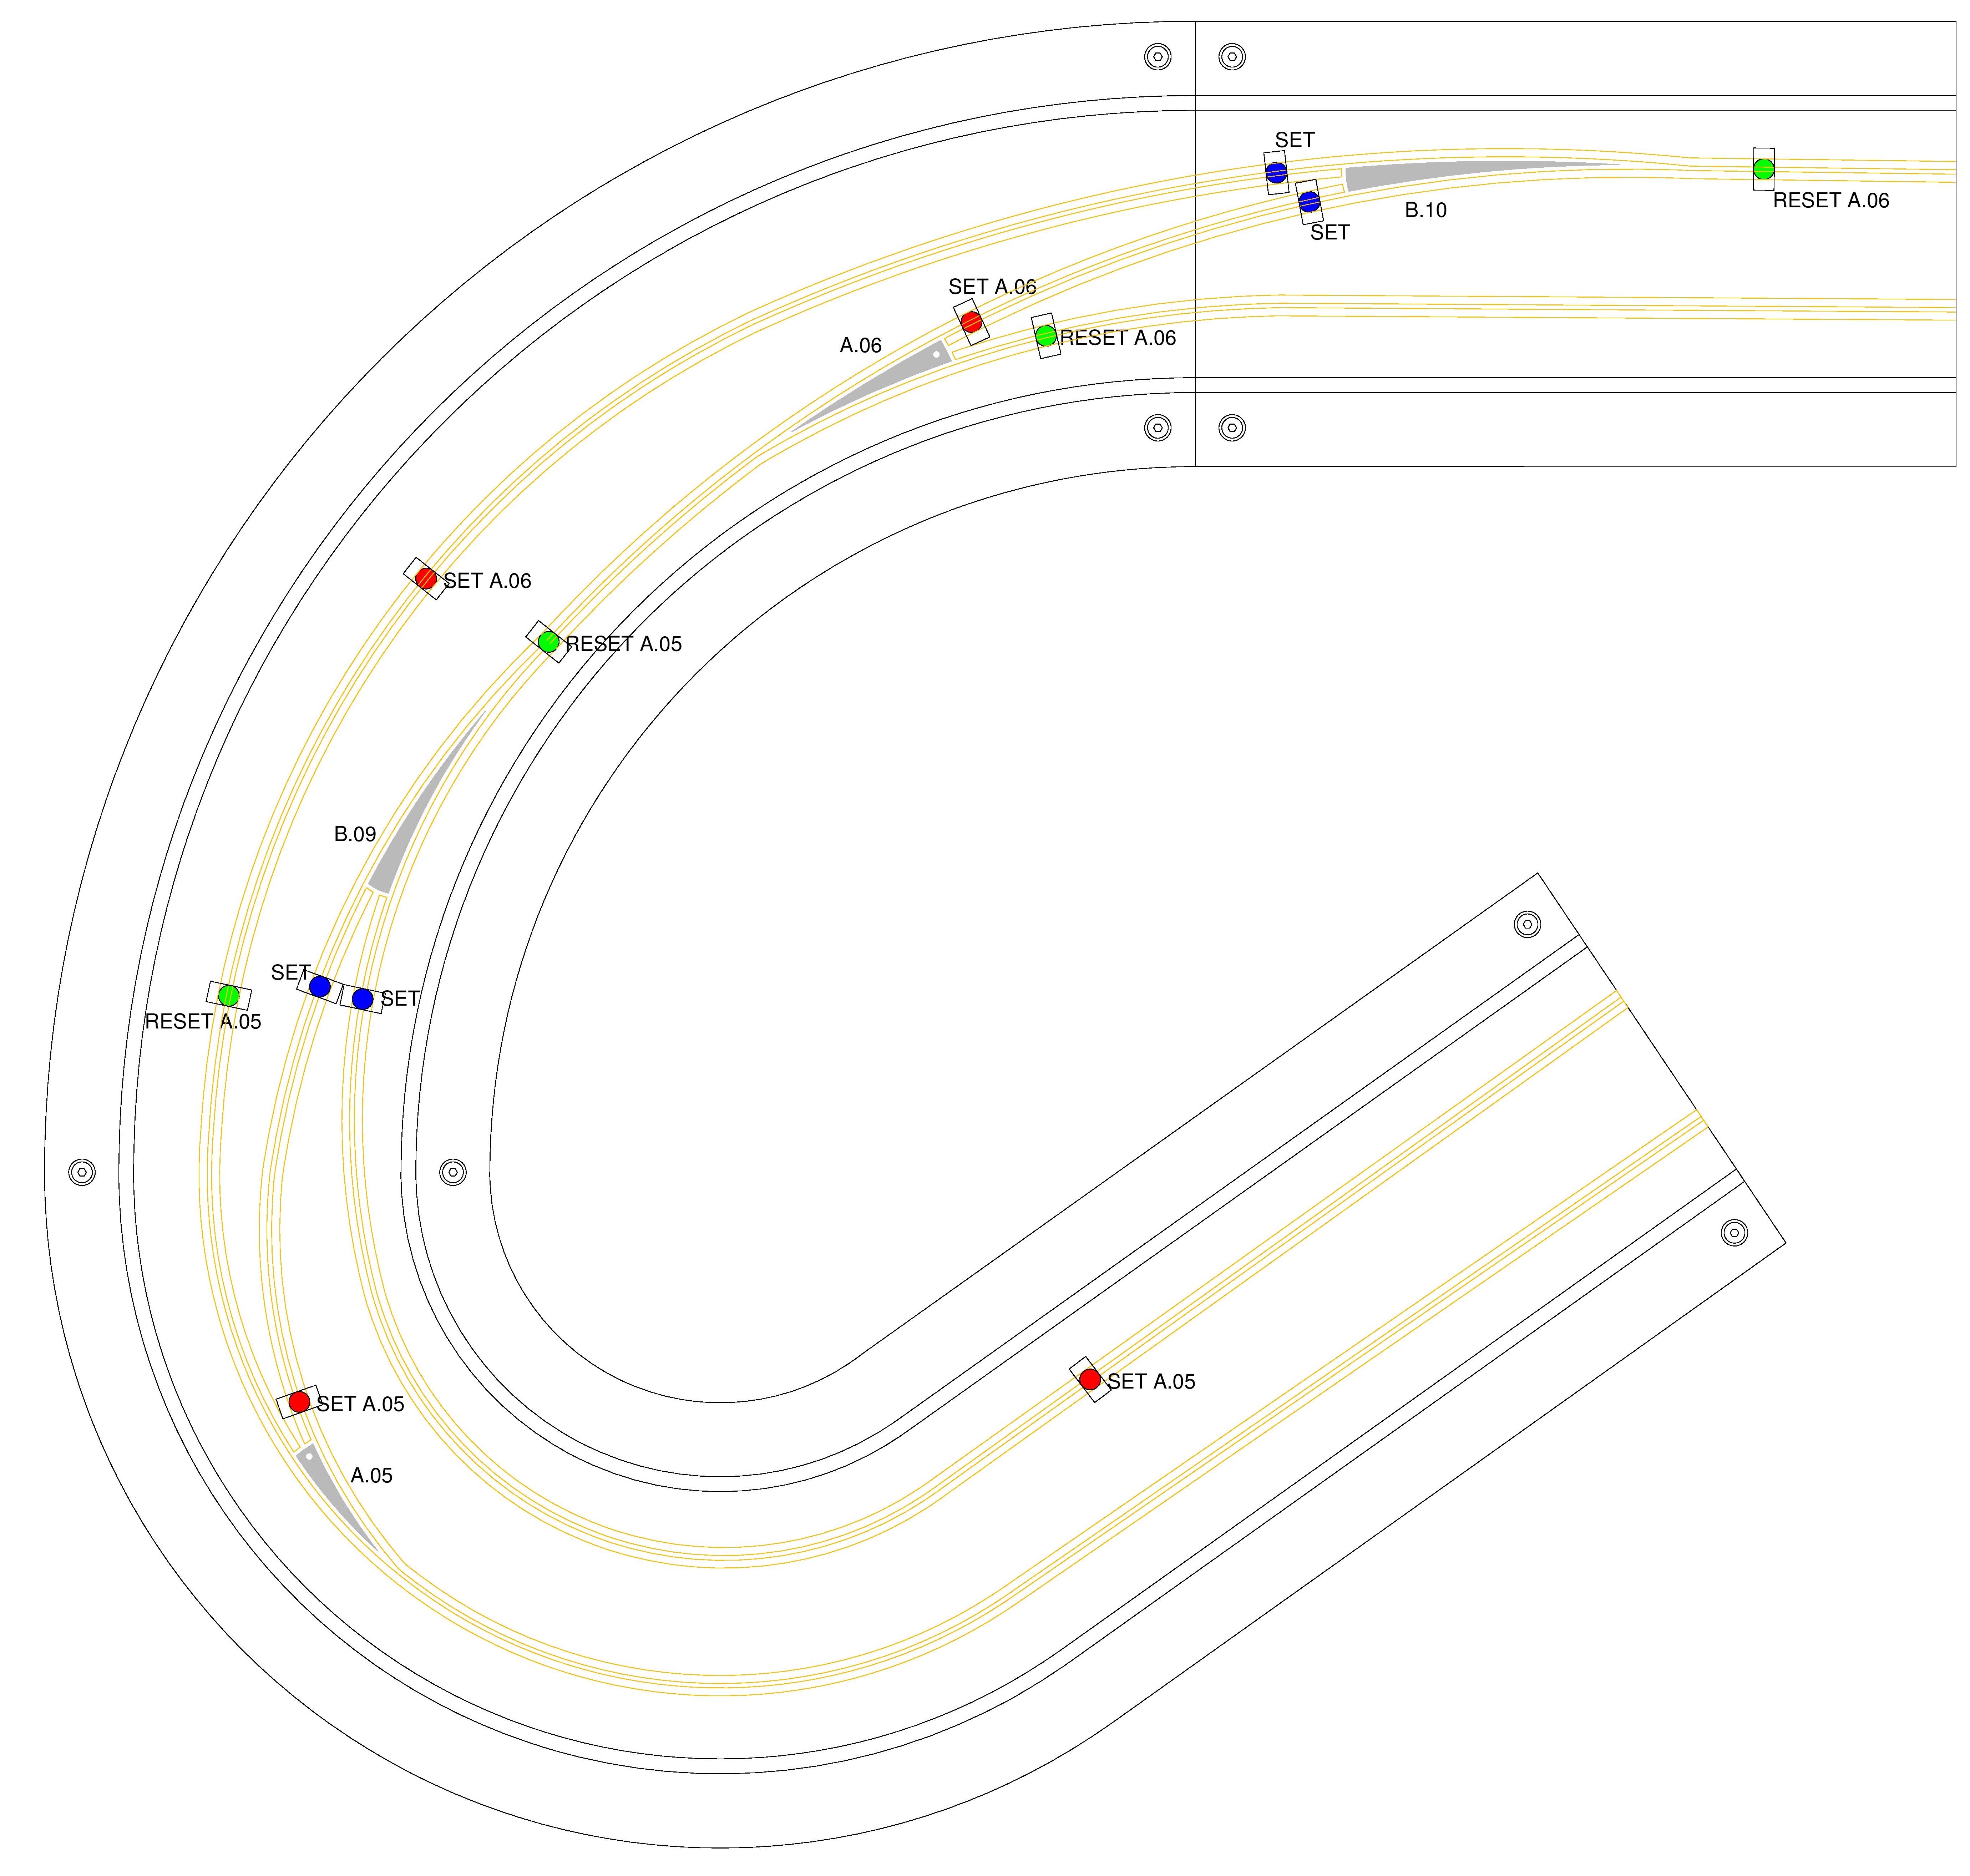
Figure 2: This is my Turn 3.
The leading car always follows the racing line into a curve. I have a racing rule; that it’s only pursuing cars that are allowed to use the 4 Scalextric LC’s.
Into the hairpin of turn 3 (figure 2) you can attack the leading car into the curve from the inner lane. If you pass the SOS ‘SET A.05’ before the leading car reach the LC ‘A.05’, you will force it into the outer lane and avoid a potential collision and get a chance to overtake.
On the other hand, you can choose to follow the leading car closely and when it pass the SOS ‘SET A.05’ just after LC ‘A.05’, you will be guided to the outer lane, again with an opportunity for overtaking.
You will have similar opportunities at the next LC: ‘A.06’.
Note: The pair of blue SET SOS‘ before each passive out flipper, will secure that a passing car will get the right electrical potential.
Get more information about how it works in the ‘Technique‘ menu.